Straw Bales Construction
One of the Oldest Construction Technique – yet can fulfill Human Housing Requirements
Straw Bales construction is a building method that uses bales of straw as structural elements and/or building insulation. Straw has been used as a building material for centuries for thatch roofing and also mixed with earth for cob walls, and wattle and daub walls. Straw is the springy tubular stalk of grasses such as wheat and rice that are high in tensile strength. It is not hay, which is used for feeding livestock and includes the grain head. Strawbale walls are rendered and are surprisingly resistant to fire, pests, and decays. Greenhouse gas emissions associated with straw bales are very low. One ton of concrete requires more than 50 times the amount of energy in its manufacture than straw.
The structural capability of straw bales is surprisingly good. In the loadbearing (‘Nebraska’ style) straw bale method, walls of up to 3 stories have been constructed. Most straw bale construction uses a frame of timber or steel for the building structure to comply with the construction code (available in some countries around the world).

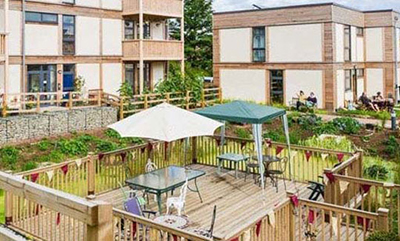
There are many examples of multistorey buildings in framed straw bale construction. The straw must be kept dry throughout the whole building process until it is plastered.
Different types of structures that can be built with Straw Bale

Loadbearing Method:
This is the original method of building, pioneered by the Nebraskan settlers in the USA. In this method, the bales themselves take the weight of the roof – there is no other structural framework. They are placed together like giant building blocks, pinned to the foundations and to each other with coppiced hazel, and have a wooden roof plate on top. The roof plate is fastened to the foundations and the bales with coppiced hazel and strapping, and the roof is constructed in the usual manner on top of the roof plate. Windows and doors are placed inside structural box frames, which are pinned into the bales as the walls go up. In this method, walls are constructed first, then the roof is placed.
The lightweight frame and loadbearing:
One of the most important design features of a loadbearing straw bale house is to distribute the loads as evenly as possible around the whole building. Never use point loads. This design has been pioneered by Barbara Jones of Amazon Nails as a way to retain the benefits of the loadbearing style, yet enabling the roof to be constructed before the straw walls are built, thus giving protection against the weather throughout the wall-raising process. It uses a timber framework that is so lightweight that it cannot stand up alone. It requires temporary bracing and/or the use of scaffolding to give it stability until the straw is in place. The straw is an essential part of the structural integrity of the building, more so than the timber, and it works together with the timber to carry the load of floors and roofs. Timber posts are located at corners and either side of window and door openings only and are designed such that the timber wall plate at the first floor and/or roof level can be slotted down into them once the straw is in place allowing for compression on the bales.
Post and beam or Timber Frame
In this method, the weight of the roof is carried by wood, steel, or concrete framework, and the bales are simply insulation blocks between the posts. This has often been the preferred option for architects, as the structural concepts are not innovative and rely on an already established method of building, therefore the risk associated with an experimental technique is minimized.
Hybrid Design:
There are many types of straw buildings that use a combination of ideas from the above techniques or use new ideas. It is still an experimental method, and being so simple, allows for invention during practice. Here the bales are used much more like conventional brick walls, with cement mortar holding them all together. The bales are stacked in vertical columns so the cement, in effect, forms posts between each stack. The whole building is cement rendered inside and out. It is rarely used now because of the knowledge of simpler methods.
How to choose a good stack of the good straw bale?
Bales should be dry, well compacted with tight strings, be of uniform size, and contain virtually no seed heads. Bales must not be damp and must be protected from dampness during the building process. Moisture content should not exceed 15% (wet weight basis). Bales should be roughly twice as long as they are wide, and the larger the better. Strings must be very tight so that it is difficult to get fingers underneath.
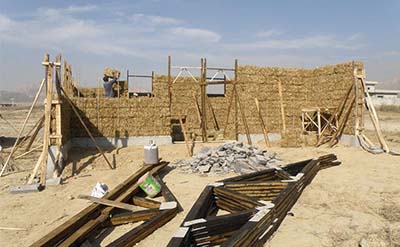
How to build a Straw Bale House?
Strawbale houses are simple, inexpensive, and are made from sustainable eco-friendly materials. Strawbales are placed around each other to form a wall. Then they are plastered using earthen plasters. The walls of strawbale houses are quite thick which is responsible for their excellent thermal insulation. The step-by-step guide to build your own strawbale house is discussed below. Following these steps carefully, you can make your own strawbale house with your own barehand with the help of a few friends or you can hire professionals to do it for you.
Step 1: Preparation of site and layout of building:
Clean the site. There should be no grass, plants on the earth. Also, when you make adobe bricks, don’t use the topsoil material as it contains a lot of impurities. The mixture should be free from glass plastic large stones, small pieces of wood, roots, etc. Also, compress the site if necessary to avoid settlement in the future. Compressing on loose soil is mandatory Once the site is cleaned the next step is to make a layout of your building. Layout simply means transferring the walls from plan to site. Take a limestone powder and place it where your walls are going to be on the ground.
Step 2: Foundation:
All buildings need to have some sort of a foundation on which to build. This will always be a natural foundation, i.e., the earth beneath you, which can be bedrock, firm clay, compacted gravel, etc., and may also include an artificial foundation such as the widened base of a wall. As the foundation has to carry the weight of the walls above it, and other loadings such as floors, furniture, and roofs, it is important to know what type of earth (or subsoil) is found on your building site. Different types of the earth will carry different weights. Bedrock, for instance, will carry much greater weight than soft clay. When the foundation is built up above ground level, it not only provides drainage for the wall but also protects rising dampness. Like most natural earthen buildings, we can use rubble trench foundations or concrete foundations under the straw bale house. A stem wall made of stones of height 2ft or 3ft is required. In the case of straw bale houses, earthbags filled with sands can also be used in foundations.
Rubble Trench Foundations
This type of foundation consists of making a trench of 2ft by 2ft beneath the walls of your structures and then adding gravel in 3 layers of 8”. Each layer is compacted before placing of next layer. If water the slope of the trench is an important parameter in this foundation. The Foundation trench is made on such a slope that water should flow out of the building. When you had built a trench, take a bucket of water and test your trench.


Earthbag Foundations:
Earthbag foundations offer many advantages over reinforced concrete foundations and work well with many types of sustainable buildings. In particular, they are low-cost, fast, and easy to build, require no cement, and require no forms or expensive equipment. Earthbags are simply polypropylene sandbags (rice or feed bags, for example) filled with soil, sand, or aggregate obtained from or near the building site. Unlike adobe or rammed earth, which require a rather specific mix, almost any type of soil or aggregate will work (expansive clay soils are not recommended for foundations). Aggregates are preferred for foundations because they will readily drain away any moisture and prevent wicking into the wall system. Designed to control flooding and resist explosives, earthbags are amazingly strong, durable, and versatile as long as they are protected from direct sunlight. Keep earthbags tarped until they are plastered.
Step 3: Walls:
Depending on the type of structure, the walls can be loadbearing or not. The load-carrying capacity of strawbales is comparable to cob walls. The walls of strawbale houses should not touch the ground level. Moisture can affect the strawbale very much. That’s because plastering of strawbale walls is very important. The plastering of strawbale walls should be done in two layers of 1.5” thickness. The walls of strawbale can be loadbearing or not, the details of both are discussed in later sections.
- Load Bearing Straw Bale walls:
The straw bale walls are stacked up on top of the foundation to the roof height, some kind of a header (usually wood) is placed on top of the straw bales with attachments of one sort or another to the foundation, and then the roof is put on top of that header. One has to be careful to not put too many doors or windows into the wall, or there won’t be enough strength in the straw bales to hold up the roof. One needs to brace the walls as they go up, otherwise, there’ll be nothing preventing them from falling over until the top plate or header is put on. For larger loadbearing buildings, it can be helpful to use temporary corner braces, to provide a guide to keep corners vertical. Structural doorframes are fixed securely to the foundations or baseplate before the straw is laid. Window boxes are built into the walls as they go up and pinned through the base and sides with haze. The first course of bales must be placed slowly and carefully as these provide the template from which the walls will emerge. Bales go together like a giant. Work from fixed points into the center of each wall; place the corner bales first, and those beside any framing posts. Bales may need to be handpicked to ensure a snug, not over-tight fit. The straw bale walls are raised and exterior bamboo pins are installed. Temporary braces are used to plumb the walls. The bales are stacked on top of each other. Before putting it on walls, make sure to compact it. Bales are placed till roof height and are strapped with coppiced hazel. A header made up of wood is placed on top of the walls on which the roof is installed. The header will directly transfer a load of the roof to the bales wall. - Non-Load Bearing Straw Bale walls:
The frame is built, and with wood which will take the load of the roof. The strawbales will be fitted in-between the frame, so all they do is hold up their weight. The cost of this type of house is relatively high as compared to loadbearing. This type of structure allows us to use many doors and windows as compared to load-bearing walls in which we can have limited doors and windows.
Step 4: Windows, Ventilator, and Door frame:
Place the wooden door and window frames where you want to have the windows and doors and then build your strawbale walls around them. This is as simple as that. For placing the ventilator, always try to place the ventilator at the top of the wall. In this way, they will not need any support and no frame will be required. The roof will act as a lintel to them.
Step 5: Roofing
The design of the roof for a strawbale house is not unusual nor particularly different from that for any other building. The main consideration for loadbearing and compressed frame design is that the loading is spread as evenly as possible around the perimeter walls, and this must be remembered whilst the roof is being covered in. Truss rafters should be spread across the walls, not stored at one end of the building before fixing. As the roof is loaded up with slate, tile, etc., these should also be distributed evenly and not loaded in one spot, nor should half the roof be slated before the other half. Straw houses need a good hat to protect them from the weather. A large overhang is a feature of straw bale buildings, especially in rainy climates. Just as traditional thatched houses have a roof overhang of about 500mm (20″), so too do straw ones. This gives really good protection to the top of the walls against the rain.
Step 6: Plastering
Straw needs good ventilation around it to stay healthy. In practical terms, this means that anything used to weatherproof or decorate the straw must not block this breathable nature. The ideal finishes for straw are traditional lime-based plasters or natural clay plasters since these are also breathable materials, painted with lime-wash or breathable paints. The internal and external faces of the straw walls should be given a very short haircut – trimmed down to a neat finish. All the long, hairy, unkempt bits of straw should be removed. A long-lasting plaster ensures a long-lasting straw bale house. Two types of plaster can be used to plaster and finish the straw bale house. Lime-based plaster and clay-based plaster.
- Lime Plaster:
Lime-based plasters are made by a mixture of lime(quicklime) and sand. They are mixed in the proportion of 1:3 (1 part lime and 3 parts sand). Lime-based plasters are the most used choice for an exterior plaster system on straw bale homes. The fantastic mixture of breathability and durability makes lime-based plaster a predictable, low-maintenance finish. A plaster pump to apply 2 to 3 coats of lime and sand plaster to the prepared straw walls. A final 3rd or 4th coat is often applied by hand after windows and doors have been installed. When using lime-based plaster on straw bale walls it is best to do all the coats out of lime. - Clay Plaster:
The systems used with Clay-based plasters are as varied and important as the systems used with lime-based plasters. The most important detail is not to use metal mesh or wire with clay-based plasters. The reasoning behind this is that the clay allows moisture to move through it so easily that the metal may rust and destroy the plaster. For this reason, fiberglass mesh, plastic mesh, or burlap is used in the place of metal. The two main clay plaster systems used on straw bale houses are sand-clay plaster and straw-clay plaster. When installing sand-clay plaster a plaster pump can be used to apply 2 to 3 coats of plaster. Then a fiberglass or plastic mesh is troweled into the still-wet plaster for reinforcement. A topcoat is normally done by hand after the doors and windows are installed. Firstly, the timbers and metal mesh with plastic or fiberglass and the mix is applied by hand and smoothed out with wooden floats. As with the sand-clay example, a topcoat is normally applied by hand and may or may not have straw in it.
Step 7: Flooring:
Nobody wants to lay their feet on the uneven surface. The floor of the unfinished strawbale house is just as same as the floor outside the building. So, we need to provide some kind of finishing to give it a proper surface. The ground is compacted a little bit and then plaster is applied on the ground. This plaster is done with a mixture of fine clay and water. After plastering, the surface is coated with linseed oil.
Rubble Trench Foundations – Youtube Video
Straw Bales Construction – Download PDF
Straw Bales Construction (Whitepaper Explained in Urdu/Hindi) – Youtube Video